Shortcuts done 🎉.
Last part, scheduling.
For this part, I didn't do much myself. I found this post where it's very clear how to do it. I followed the steps and works perfectly. Likewise, I'll explain it to you with a few screenshots that I think are missing in the original article.
Previously before scheduling, I wanted to have all my shortcuts together (I'm tracking different prices) to run them all at once.
Easy. Create a new shortcut.
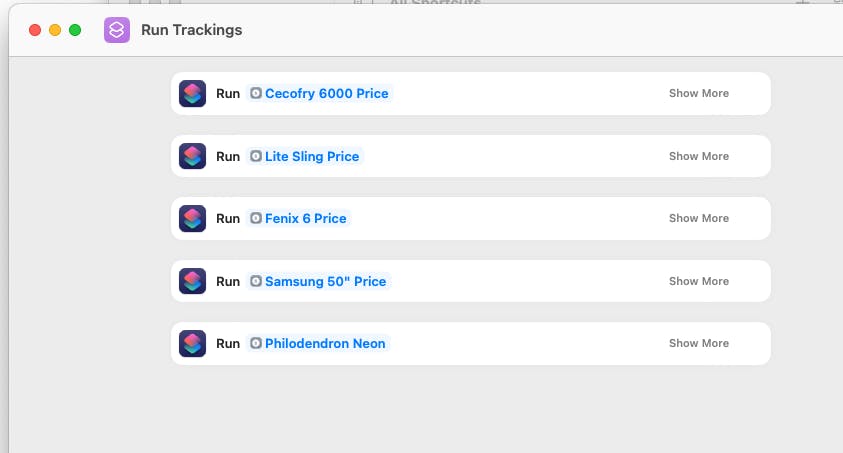
Now, the part that's already in the article. I'll go straight without paying much attention to details. If you want to dig deeper, check out the article.
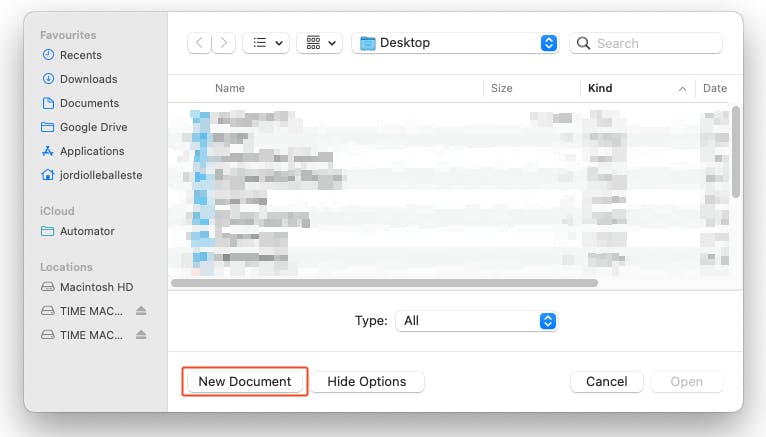
It's time for Automator to work. The first thing when we open it is to choose New Document.
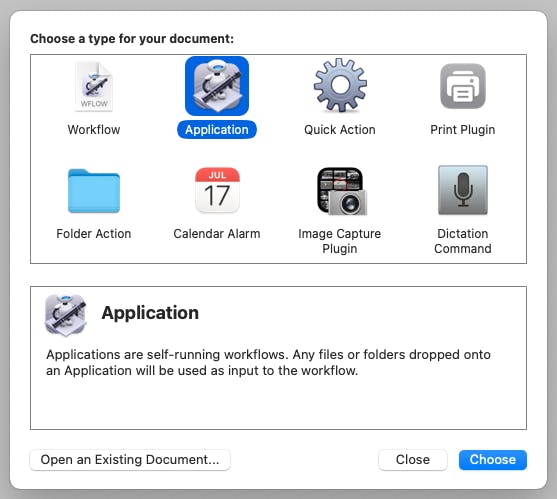
Right after, we will have to select the type of the document. We choose "Application".
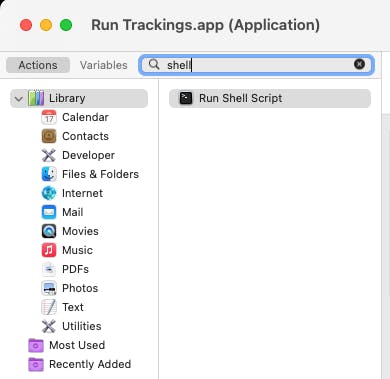
When it's created, we go to the search bar and type "shell". We will only have one result. We double-click it.
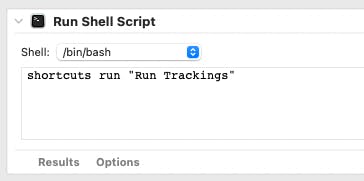
When it's inserted, we only need a simple command to run the shortcut. It is shortcuts run "Name of the shortcut"
Once that is done, we save the application (it's up to you where you save it).
Now we move on to the Apple Calendar. Let's suppose we want to run the app every day at 7am. First thing we have to do is:
- Create the event.
- Make sure to put the same start and end time.
- Set repeat to "Every Day".
- Choose "Custom..." from the alert options.
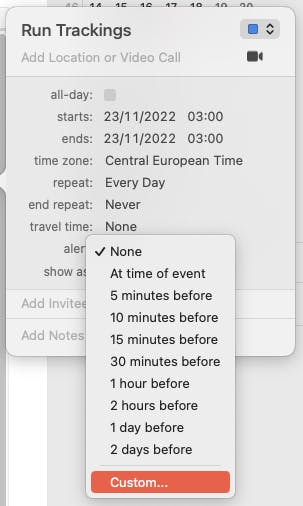
Next up is customizing the alert.
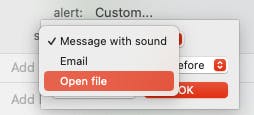
Step 1️⃣
Change from "Message with sound" to "Open file".
Step 2️⃣
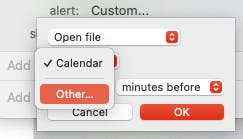
Change from "Calendar" to "Other...". This will pop up a window where we have to select the application we saved with Automator.
Last step
Change from "15 minutes before" (default) to "At time of event" and click OK.
Now we can see the scheduled event in our calendar, ready to start tracking.
Unfortunately, this is the third and last part.
I hope it has been helpful to you so you can check when it's the best time to buy or, for example, explore the evolution of a price throughout the year (or whatever you want to do with the price).
See you in the next post.
Salut, Jordi.
